(versión en Español)
All my friends know my opinion about Forgeworld... I had always maintained that quality-price relationship was not good enough.. That you could scratchbuild better models on a fraction of the cost, and so on... you know that I mean.
Well, at least it was until they released their Death Korps of Krieg Range. Then I had to admit that the figures were in fact... very interesting... German-like gas-masked troops? count me in... Even worse, Forgeworld continued releasing more Krieg tanks, support weapons, infantry... Real-looking trenches... Wow! Those guys must have been somehow reading our collective-gamer mind.
Then, I finally cracked and bought some DKOK stuff from Forgeworld. It was expensive, but I was not dissapointed when I got it on my hands.
I am going to talk here about the little Centaur gun carrier... It is my first experience with Forgeworld resin range (not my first experience with resin, as you know) and I had learnt some things on the way.
The kit is presented in a bag, with an instructions leaflet wich is very clear. Some pieces had a little warpage. some had casting defects and all of them were covered in that resilient demoulding agent everybody knows about.
Casting quality of the vehicle is not too bad, although not to the moderns standards of some aftermarket brands on 1:35. Compared to other older Forgeworld kits I ordered in the same batch it is clear that they have improved a lot, but you should expect some nasty moulding lines and other defects requiring filling, sanding and sometimes reconstructing rivet detail and so. That might sound bad, but this is in fact something normal in most resin kits on the market.
On the other hand, casting quality of the troopers is simply astounding. Nearly invisible moulding lines, practically no defects or bubbles and an incredible level of detail (I DO know I am going to enjoy painting them).
Those are the pieces presented in the kit:
 I did some colour testing before even thinking about cleaning the pieces. I prefer to see the actual coulours in a piece of white paper instead of comparing them on the jars. For this model I am going to use the Vallejo Model Air range. It is like the standard vallejo paint, but already dilluted for airbrush use.
 Well, I also did as everyone recommends in the forums around. Wash the pieces in hot water, using soap and a toothbrush. I really tried to remove the demoulding agent, but you'll see later that this stuff is really horrible! Next time I'll test some lacquer thinner... let's see who is the winner (I hope not to melt the resin with it, this is why I call it a test).
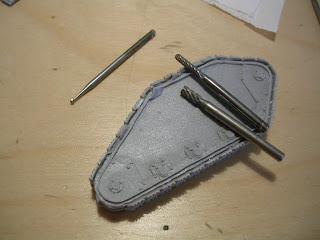
As you see, there are some imperfections that I am going to remove with those burrs and my trusty Dremel tool.
 I had to practically redo this slot, something easy with a Dremel in hand.
 This is the nasty moulding line I talked before. I simply flattened the area with a diamond coated file and reconstructed missing details with plasticard rivets.
 The model is already primed and basecoated. I used Vallejo's primer and then a mix of Model Air paint and X22 Tamiya Clear varnish. Adding gloss varnish to the base coat gives it further adherance and strength. It also gives it a satin finish wich is useful when weathering the model.
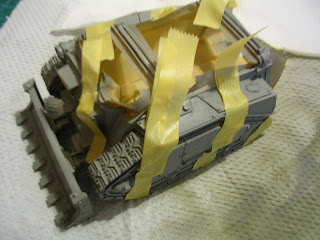
I masked it with Tamiya's Masking Tape and gave it the next colour coat.
 Like this.
 I masked it again, giving it the third coulour coat.
 I removed the masking tape to show the camo pattern (did I mentioned I did not like it at all?). You can also see that the demoulding agent is still there (look to the right part of the model). I really don't know what kind of demoulder Forgeworld is using, maybe something from the Chaos Lords. But I can assure you that it is really a pain to work with it.
 Anyway, I do not like my coulour choice, even after adding some filters.
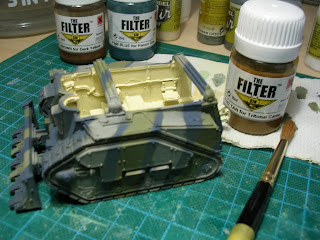
 Time to start again. I always say that it's better to start again than trying to correct a mistake. I mask the model again.
 And use different coulours this time.
 Now, that is different.
 Third coulour is a) too similar to the one I used on the habitacle and b) I used too much varnish (can you see the seams?).
 No problem at all, I am going to weather heavily this little fella. So I'll use those seams to my advantage.
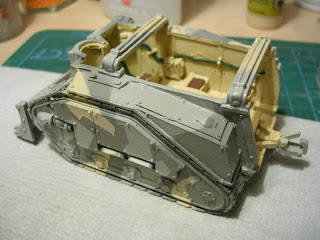
 Of course, what we get now is a boring, monochrome, and uninteresting model. Weathering is supposed to tell us a story. I want to give the viewer the impression that this Centaur is operating in the harsh conditions of trench war scenario. There is plenty of mud, and the crew had not the time to properly clean it after a while. There is going to be a mix of new, fresh mud over dry mud layers. Some rust and many scratches are going to be present too.
 I used the same techniques I shown you in the Painting and Weathering Tutorial. It is still WIP, as I have to work to do in the mud (doing mud properly can take you longer than the model itself, mud is a world in its own) but you can see how the Centaur is going to look.


Next time I'll finish the vehicle and start working on the crew.


5 comments:
Thanks a lot for sharing. You have done a brilliant job. Your article is truly relevant to my study at this moment, and I am really happy I discovered your website. However, I would like to see more details about this topic. I'm going to keep coming back here.
wow amazing, there's a model form one tv show called kamagra that is very similar,, it's the same?? anyway very smar thanks for share.
Hello, i would like to read more about this interesting topic.
This is a really good read for me, Must admit that you are one of the best bloggers I ever saw.Thanks for posting this informative article.
natural minerals
best naturals
buy curcumin
Post a Comment