(Spanish version)
PART I
PART II
PART III
PART IV
PART V
I am going to continue working on our turret. Now I am going to cut a strip of styrene to do the turret's top.
I'll use a steel ruler and a square set in order to make a straigh cut.
PART I
PART II
PART III
PART IV
PART V
I am going to continue working on our turret. Now I am going to cut a strip of styrene to do the turret's top.
I'll use a steel ruler and a square set in order to make a straigh cut.
 I cut the strip...
 The mark is going to be a little bigger than the actual top piece size, so I compensate it by cutting a little more than really needed.
 Now I use a circular cutter to open a hole for the hatch.
 Fits perfectly.
 I observed, hovever, that the top piece was not thick enough. To correct this, I glue the top to another styrene piece.
 I now wait some minutes to let it dry and cut (no need for rulers now) out the excess.
 I carefully cut the hatch hole again.
 As I plan to cast the turret, I need to close this hatch hole. I'll do that with a thinner styrene sheet.
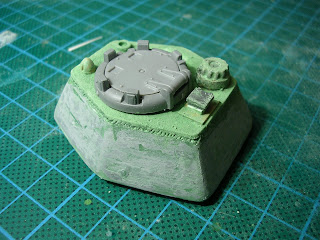
 I dillute green Squadron's putty in industrial acetone (the kind used for cleaning nail polish doesn't works). The putty should be thin enough to be painted with a brush.
 I play with the resulting texture alternating Tamiya's and Squdron's putties. I also use a hard bristle brush with a little acetone to add more texture.
 And integrate the bits in the ensemble with a little putty thinned down in acetone.


Next day, we'll start working in the cannon's mantlet.
NEXT


10 comments:
Me parece estupendo tu blog, pero me gustaria que la tradujeras al español, que es un idioma mas popular.
Mi no entenderrr españolo, camarrada Alfonso.
Pero seguro que tú te prestas voluntario por un módico precio ;)
Just a few small edits for clarity. Enjoying the log very much. Muchas gracias.
Now we do a travel to the bit box...
Now we take a trip to the bit box...
Now I am going to do a fake soldering ribbon. I put plastic cement in the desired zone.
Now I am going to do a fake welding mark. I put plastic cement in the desired zone.
Small grammatical edits
A space to share modelling techniques on many subjects. While mainly centered upon scratchbuilding Warhammer 40K vehicles, you will also find the occasional WWII model.
If this is annoying, let me know ans I will desist. Regards,
Of course not! I really appreciate the help! You are more than welcome :)
Thanks you for your help :D
Thanks a lot for sharing. You have done a brilliant job. Your article is truly relevant to my study at this moment, and I am really happy I discovered your website. However, I would like to see more details about this topic. I'm going to keep coming back here.
Hi,
This is something new I have seen here.. Really I like this tutorial.. Wonderful way of explanation..
Thanks....
ey I can use this tutorial as a good guide to repair my Mech Warriors, thanks for this important infiormation, now would be more easy!
Hello, i would like to read more about this interesting topic.
Pretty nice post. I just stumbled upon your blog and wanted to say that I’ve really enjoyed browsing your blog posts.
natural minerals
best naturals
buy curcumin
Post a Comment